If your league runs multiple races per week, the standard round-based scoring can feel unfair. A driver who races every session gets more chances to benefit from drop rounds than someone who only joins once a week. Week-based scoring fixes this by grouping your races into weeks and only counting each driver's best result per week. Here's how to set it up.
What is week-based scoring?
Week-based scoring works like iRacing's official series. You define a number of weeks in your season (for example, 12 weeks with 2 races per week). Each week, only a driver's highest-scoring race counts toward the championship. You can then drop the worst N weeks, so if you set 12 total weeks and drop 4, only a driver's best 8 weeks count. A driver who misses a week scores 0 for that week, and those zeros get dropped first. This keeps things fair whether someone races once a week or every session.
Step 1: Enable week-based scoring
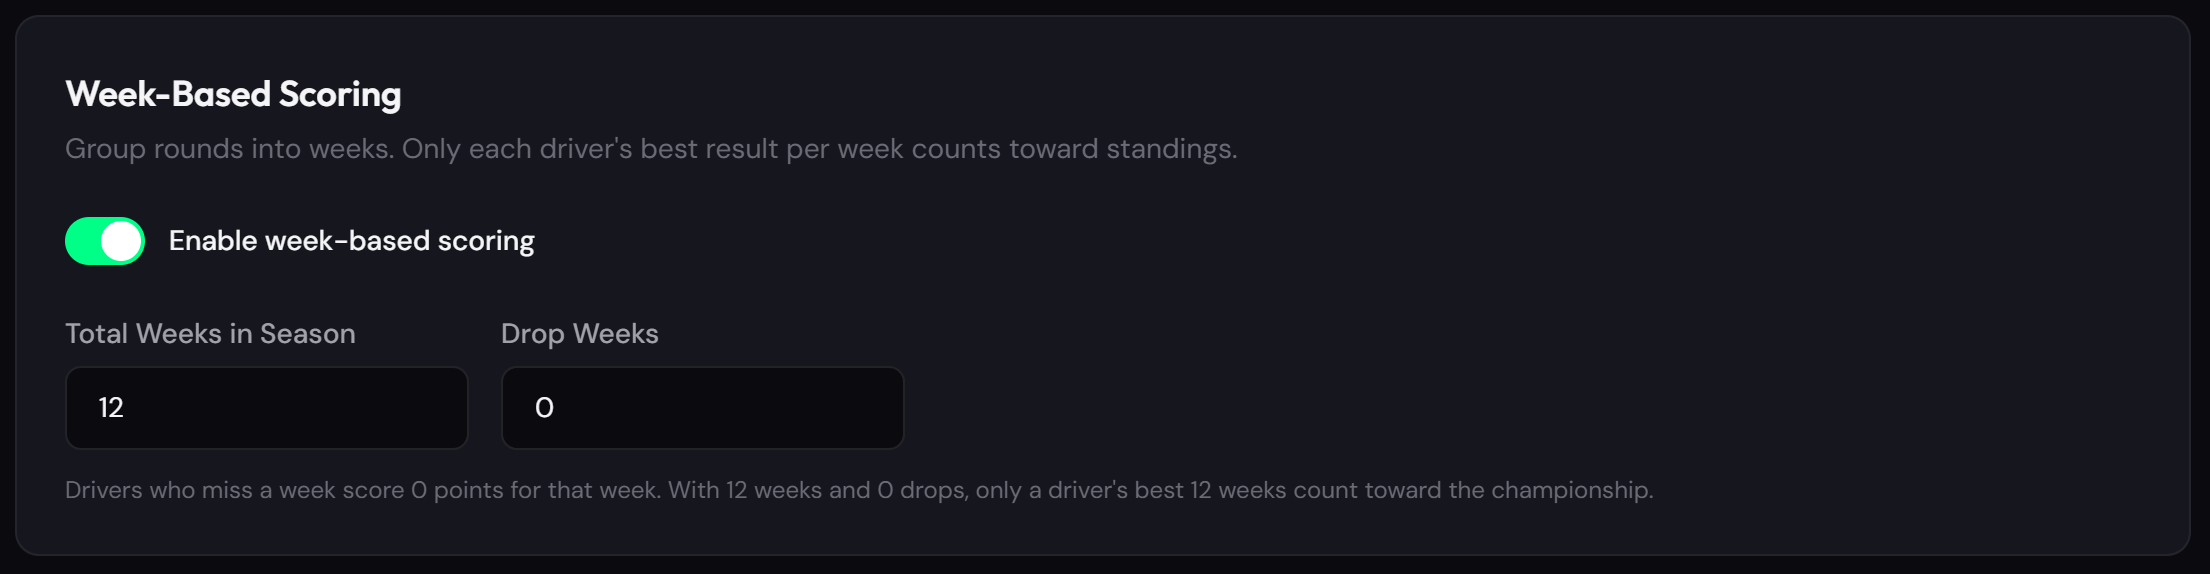
Go to your league Settings and open the Points System tab. Scroll down to the Week-Based Scoring section. Toggle it on. You'll see two new fields appear: Total Weeks in Season and Drop Weeks. Set the total number of weeks your season will have, and how many worst weeks to drop. Below the fields you'll see a live summary like "With 12 weeks and 4 drops, only a driver's best 8 weeks count toward the championship." Save your points system when you're done.
Step 2: Open the Schedule tab
Switch to the Schedule tab. If you already have rounds from before enabling weeks, they'll appear in an Unassigned section at the top. These rounds need to be assigned to weeks before they'll count in standings. If you're starting fresh with no rounds yet, you'll see an empty schedule ready for you to build.

Step 3: Create weeks and assign rounds
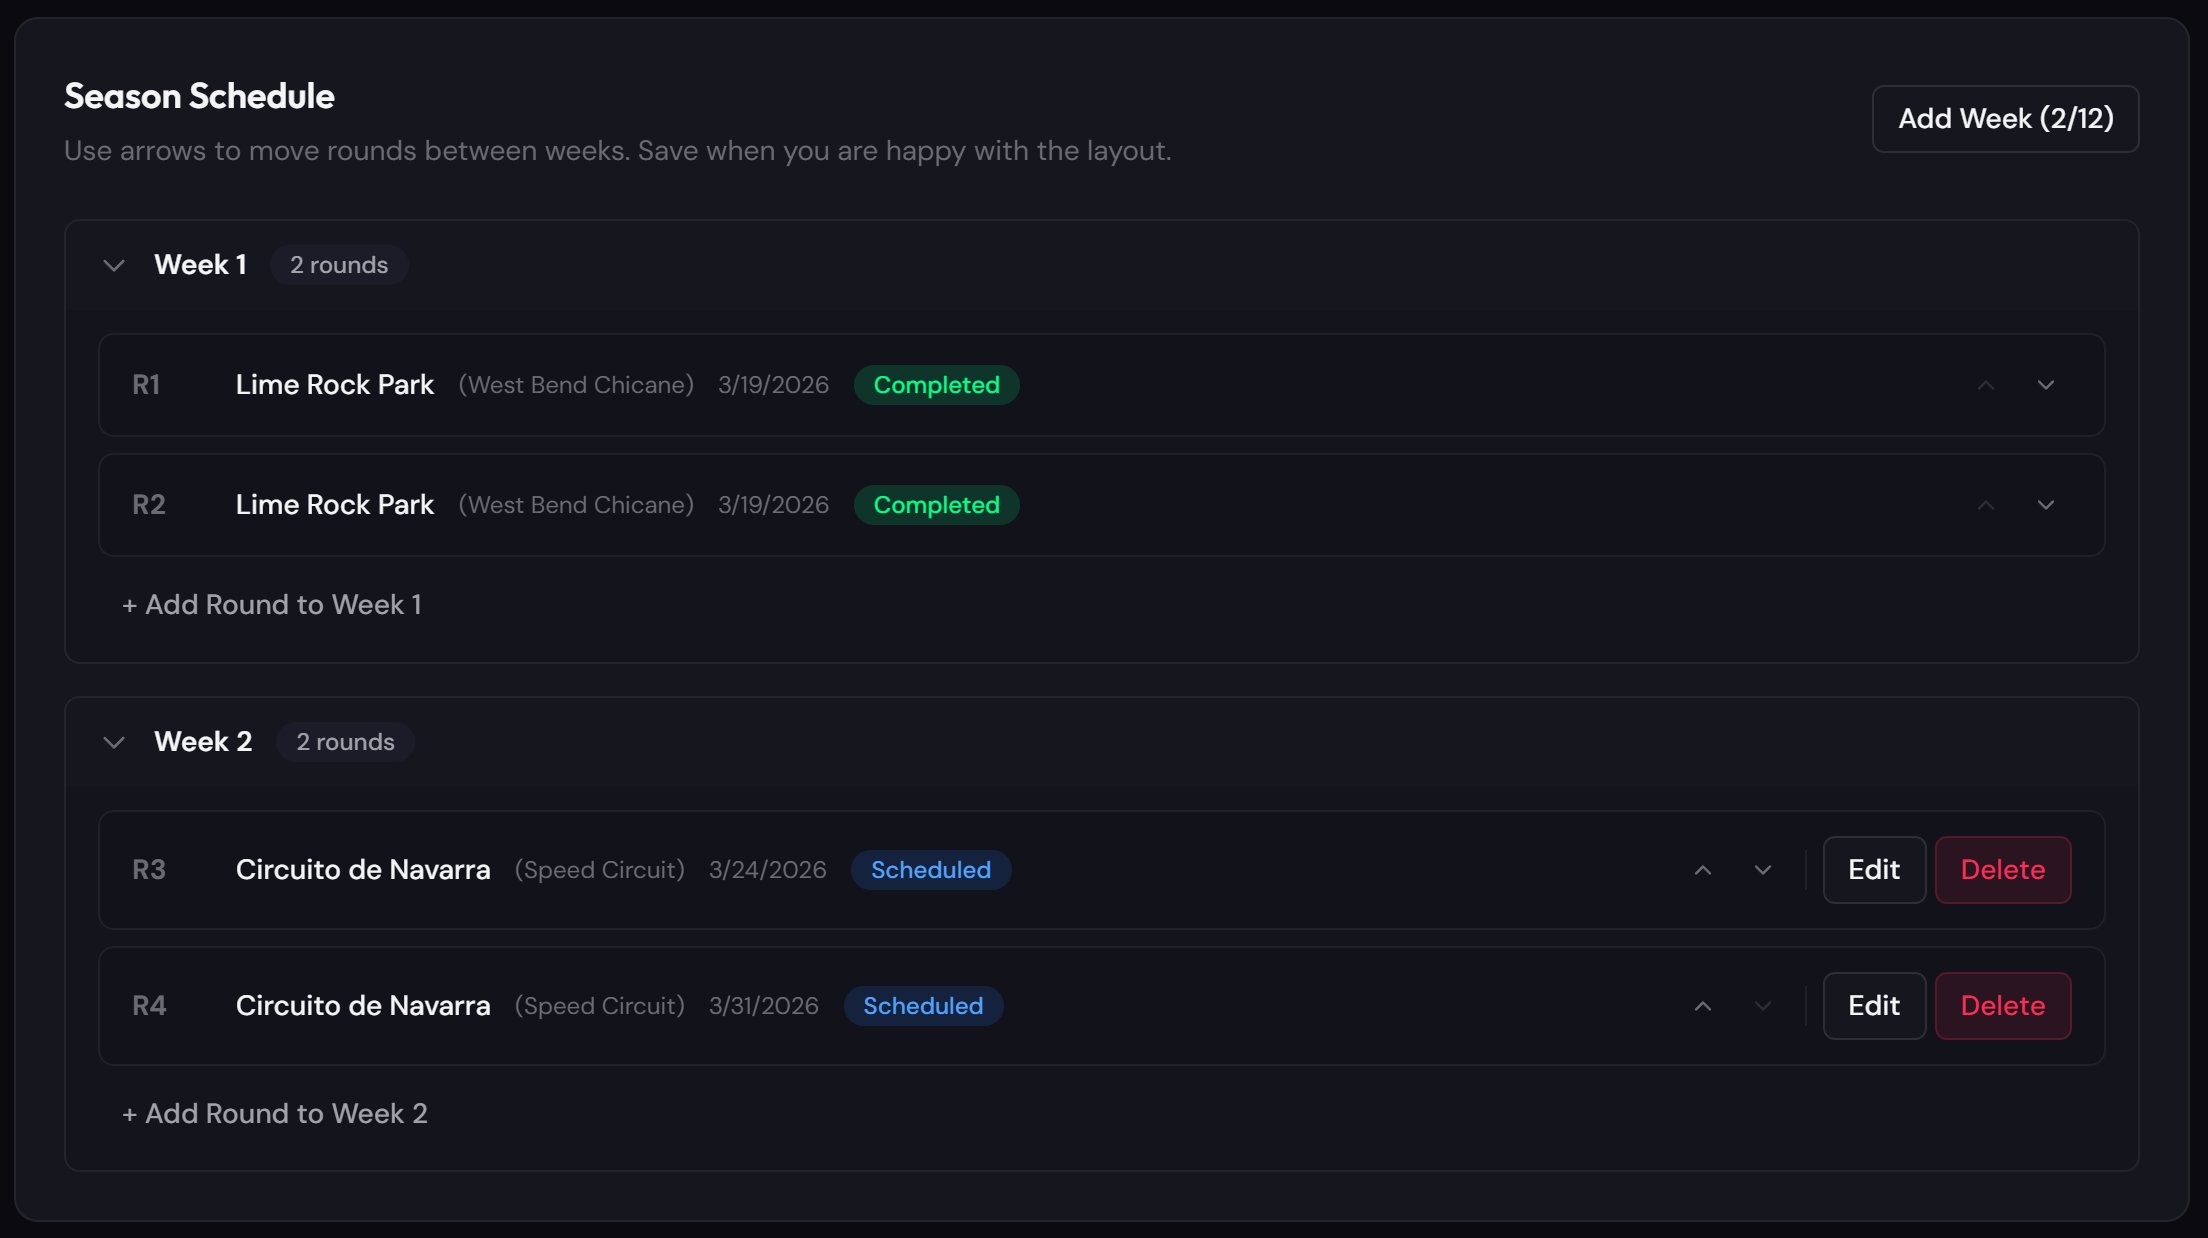
Click the Add Week button to create your first week. Then use the down arrow on each unassigned round to move it into a week. Every round, whether completed or scheduled, can be moved this way. You can also add brand new rounds directly to a specific week using the "+ Add Round to Week" button inside each week card. The Add Week button shows your progress (like "3/12") so you can see how many weeks you've created out of your total.
Step 4: Reorder and move rounds between weeks
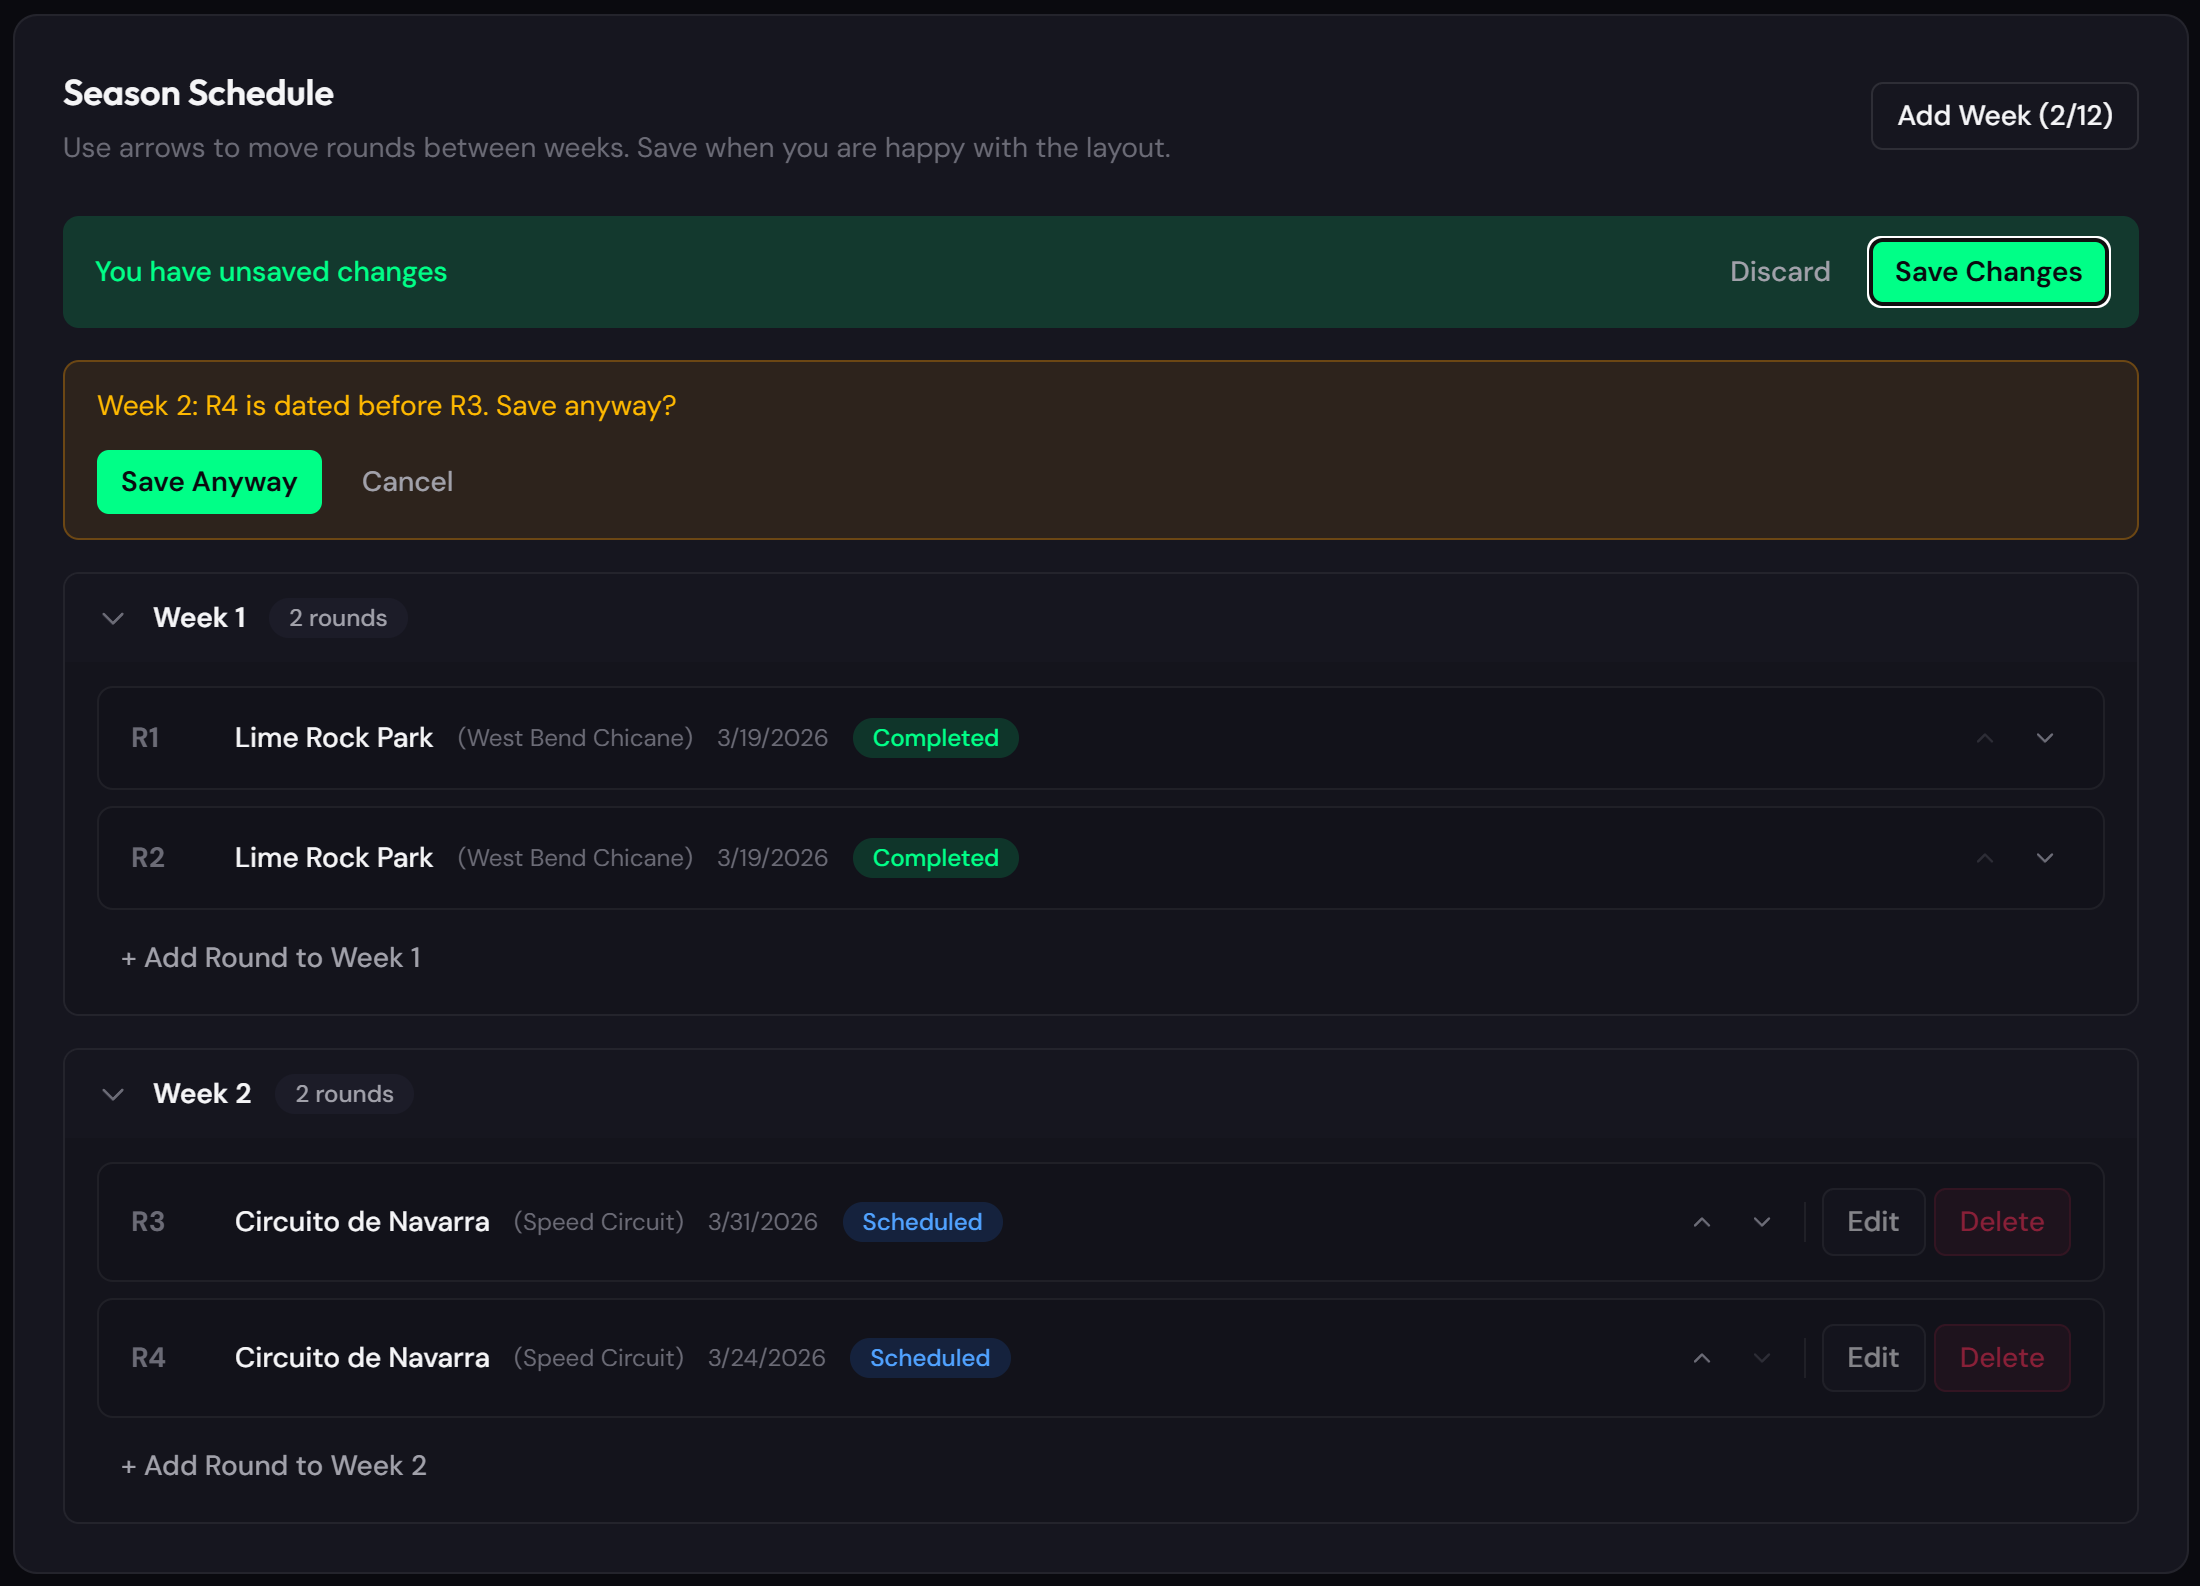
Within a week, use the up/down arrows to reorder rounds. When a round is at the top of a week, pressing up moves it to the previous week. When it's at the bottom, pressing down moves it to the next week. All changes are local until you click Save Changes. If the dates don't match the order, you'll get a warning before saving with the option to save anyway.
Step 5: How standings work with weeks
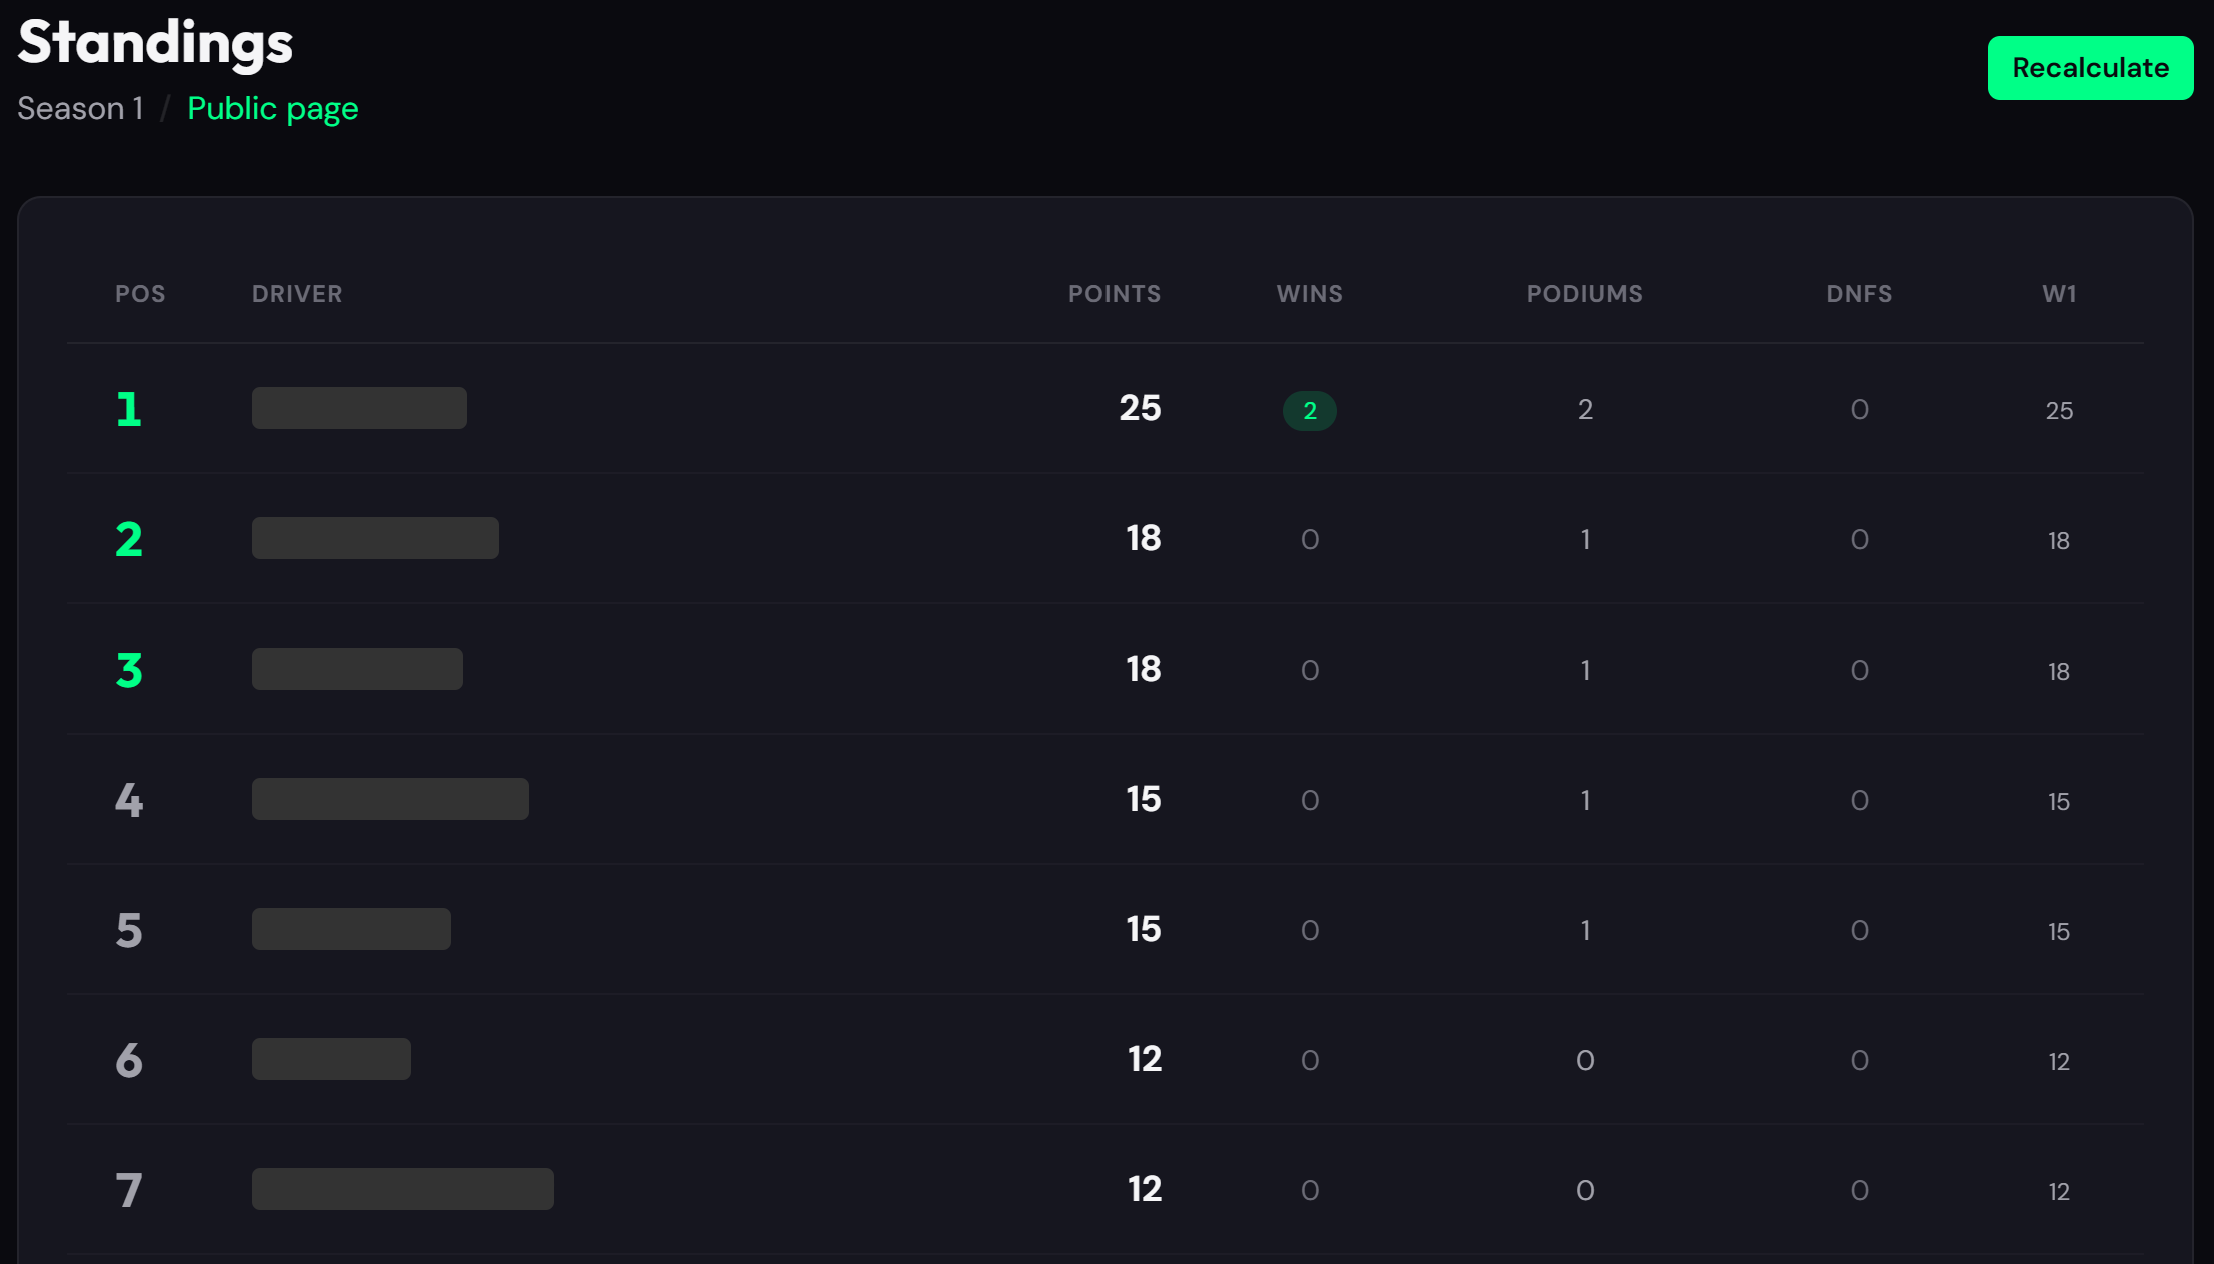
Once you've assigned rounds to weeks and recalculated standings, the standings table switches from showing R1, R2, R3 columns to W1, W2, W3 columns. Each week column shows the points from that driver's best race in that week. The Season Progress card on the dashboard also updates to show "Week 2 of 12" instead of round counts.
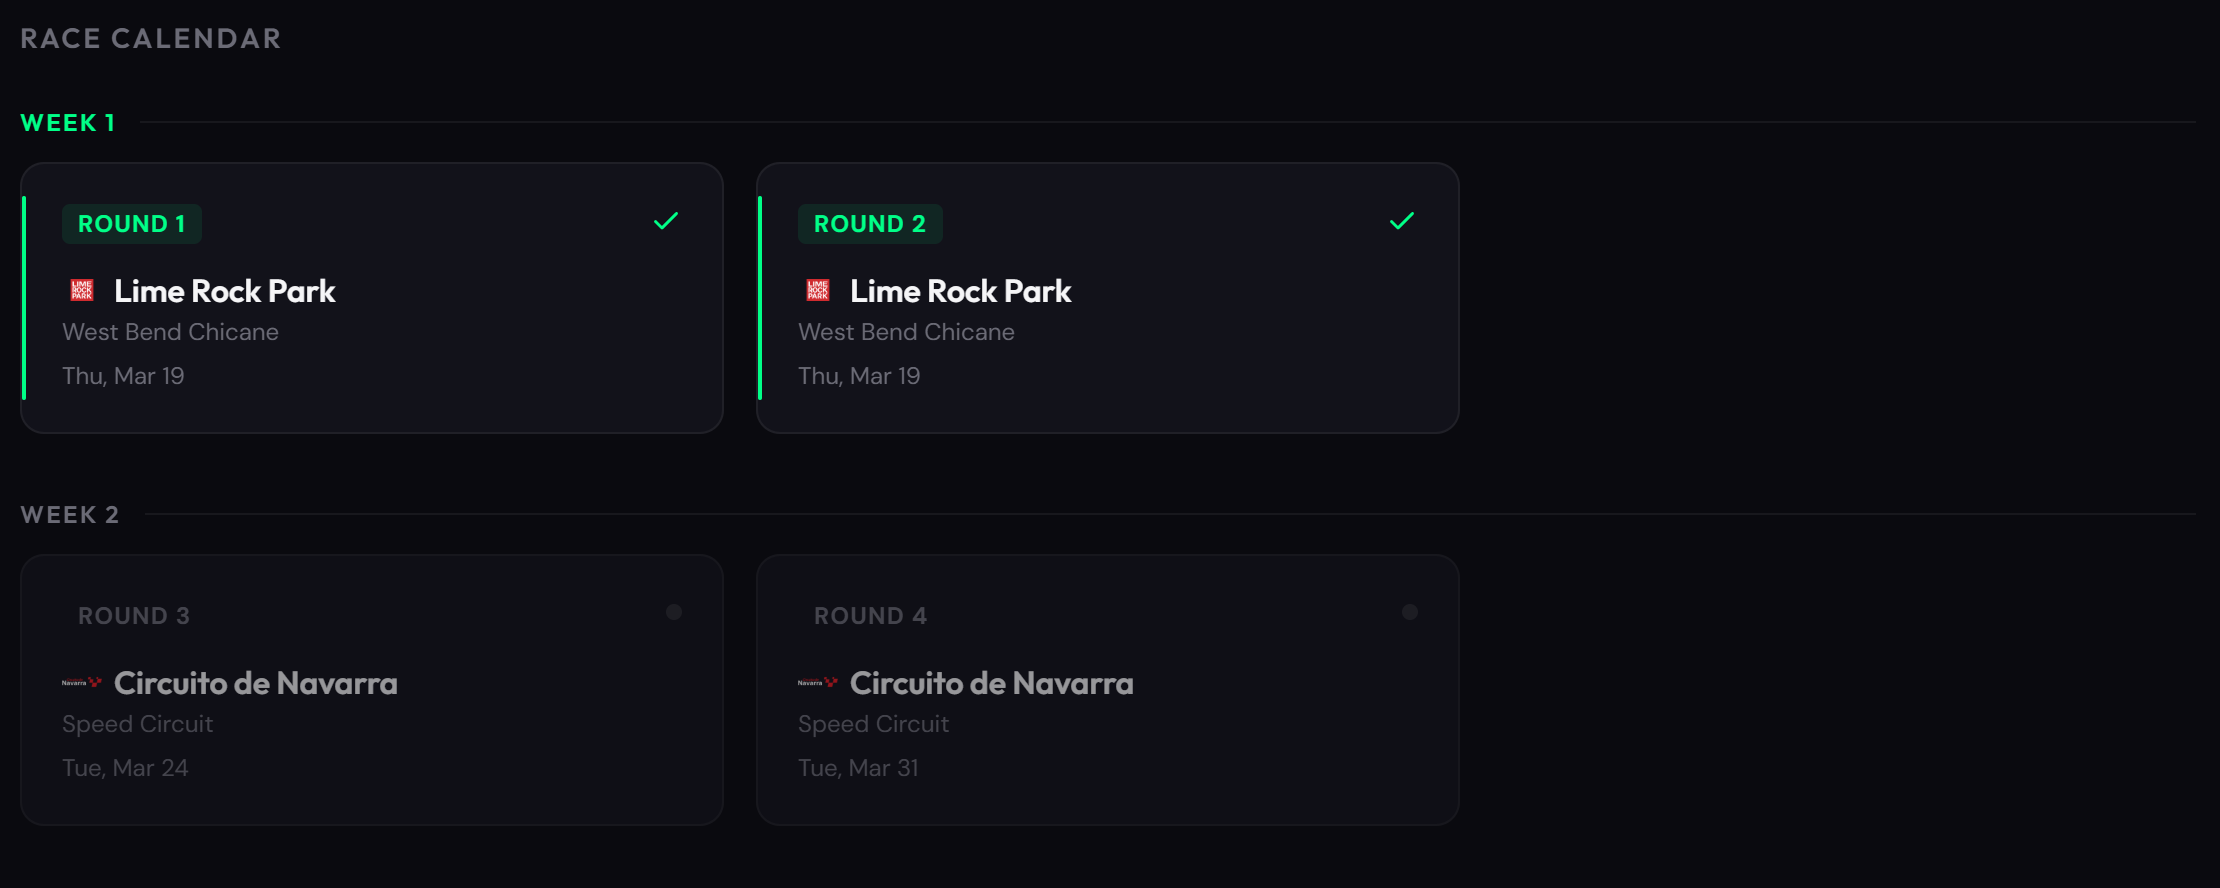
Step 6: Public standings and race calendar
Your public standings page automatically groups the race calendar by week. Visitors see rounds organized under Week 1, Week 2, etc. instead of a flat list. The results page in your dashboard also gets a week dropdown so drivers can quickly jump between weeks to review past races.
Tips
You can switch between week-based and round-based scoring at any time from the Points System tab. Turning off weeks will clear all week assignments (you'll see a warning before saving). If you turn it back on, you'll need to reassign rounds to weeks. The total weeks setting also limits how many weeks you can create in the schedule, keeping everything consistent. And remember, standings only update when you hit Recalculate on the Standings page.